Sunday, May 17, 2009

Loki's Kitchen has Moved!

I have moved! Ok, not my house, but my blog hosting site. For various, mostly vain reasons, I have moved to wordpress.


Update your bookmarks, blog readers, etc. To entice you over to my new blog, you'll find recipes for crockpot chicken, cheddar biscuits, monkey bread, and sausage and peppers!

Follow me!

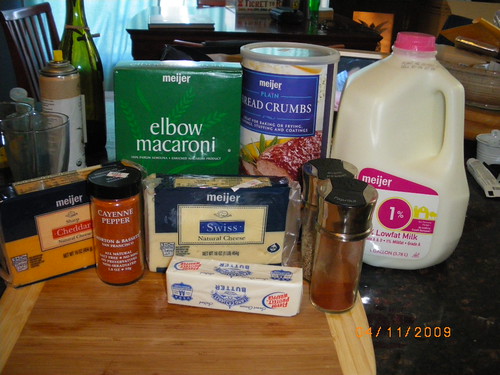
Spicy Mac and Cheese

I needed a recipe to take to a potluck with some friends, and I was craving macaroni and cheese. I found the highly-honored version on Molly's blog (myhappymeals.blogspot.com) and the spiced-up version on Shelly's (lovestonom.blogspot.com). This was really, really amazingly good.

Enjoy!

Spicy Macaroni and Cheese
Ingredients:

1 stick of butter
3 cups of milk
3tbsp flour
1/2 cup breadcrumbs
1 lb cooked macaroni
16 oz sharp cheddar cheese in cubes
8 oz swiss cheese in cubes
3 tsp paprika
3 tsp cayenne pepper
2 tsp black pepper
Directions:

In a large saucepan, melt the butter, then add the flour to make a paste. Add the chese, cut into cubes, and the milk. Allow to heat for a few minutes on low-med heat, stirring constnatly. Add the spices before the cheese is completely melted.
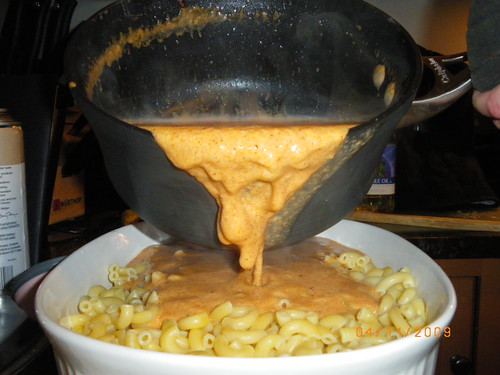
Grease a large caserole dish and put the cooked macaroni into it. Once the cheese is completely melted into a sauce, pour the cheese over the cooked macaroni. Top with breadcrumbs and bake for 30 mintues at 350 degrees. 

Enjoy, and have milk nearby!


Homemade French Baguettes

I love bread, especially crusty bread that is warm and soft inside. This recipe came from a book my Mother in Law gave me called The Good Cook - Breads, which was published the year I was born. I find it to be very good at explaining HOW bread works, and how to manipulate it. This translates to "wordy and with few pictures."  I know this from other bread-making experience, but French Bread is made without fats, no butter or oil. This is why it dries up fast and really should be eaten that same day.

Of course, I did cheat a little and used my breadmaker for the rise cycle. My kitchen is very airy and cool, so getting things to rise is difficult.  I highly doubt it changed anything. 

Monsier Monfort's French Bread - The Good Cook: Breads


Ingredients (makes 2 loaves)

3.5 - 4 cups flour (bread)
1/4 oz yeast (2 1/4 tsp)
2 tsp salt
1.5 cups tepid water

Directions: 

In your breadmaker, following its instructions, combine the above ingredients. Generally, this means put the water in first, the flour in second, the salt around the outsides of the flour and the yeast in the middle on top of the flour. Set it on to the "rise" cycle. My breadmaker (Breadman  TR875 2lb bread maker kneads the bread for 5 minutes, rests for 5, then kneads for 15, then lets it rise for 1 hour. 

If you're doing this by hand, combine all the ingredients into a bowl and then turn out onto a floured surface. The dough will be tacky. Begin turning and kneading the dough using a pastry knife. Add flour if the counter surface gets tacky, but do so sparingly. Then knead by hand, occasionally throwing t
he dough onto the surface, which will allow the dough to become elastic. Wash the bowl, then grease it, placing the dought back inside. Cover tightly and set in a warm place, allow to rise for 1.5 to 2 hours or until double in size. Punch down the dough, then allow to double in size again. 

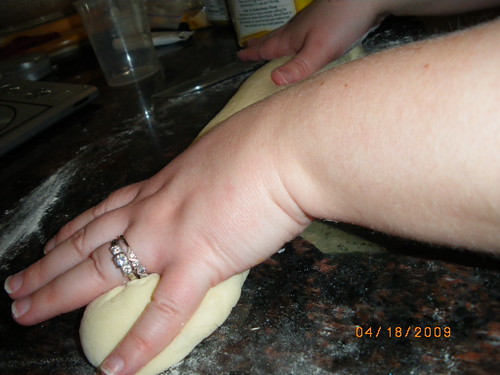
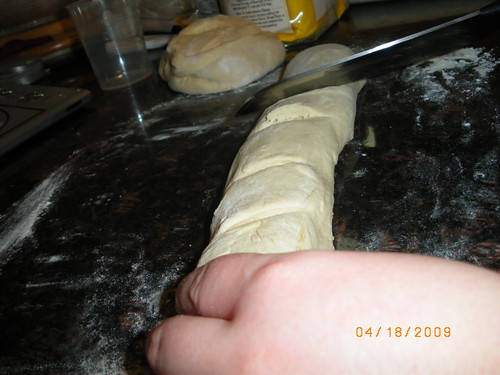
Turn the dough onto a floured surface, punch it down, and keand breifly to work out the air bubbles. Divide the dough into 2 halfs, then let the dough rest for 5 minutes. Begin to work the dough slowly into the correct shape, appx. 18 inch cylinders. If the dough resists changing shape, allow it to rest for 3 to 4 minutes at a time. 

Place the shaped dough onto a greased baking sheet, drape with wax paper, and allow to rise until double in size. 

Preheat the oven to 425 degrees. While the oven preheats, place a baking dish half full with water on the bottom shelf of the oven. Right before baking, spray or brush the loaves of bread with water, then use a sharp knife to make cuts in the top of the bread. Hold the knife at a 45 degree angle and make cuts along the top of the bread. 

Put the bread into the oven. During the first 15 minutes of baking, spray or brush the bread with water every 3 minutes. Do this from the oven door, CAREFULLY!  Bake the loaves until golden brown, about 25 to 3 minutes. A hard, hollow sound will indidate that the bread is done. 

Monday, April 27, 2009

Upcoming recipes

I've had a busy few weeks, but I've also made a few wonderful things I have not had a chance to blog. Here's a preview of the recipes you can expect to see this week:

Chicken Braised in Red Wine


Zesty Macaroni and Cheese - From Shelly!

Homemade French Bread

Stay tuned!

Wednesday, April 1, 2009

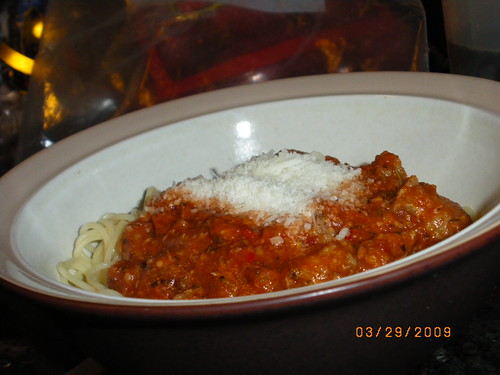
Spicy Sausage Pasta - now with more pictures!

This is a favorite of ours and it takes about 30 minutes. Its really good and full of flavor. It makes enough for 4 people but is great leftover.

Spicy Sausage Pasta

Ingredients:

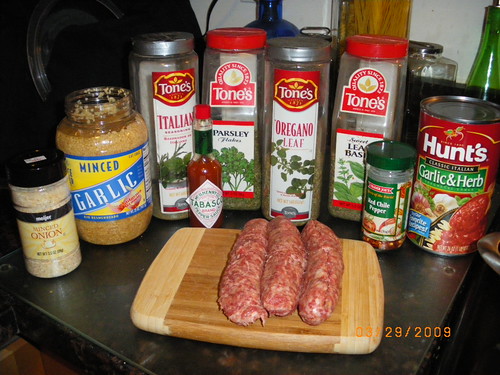
3-4 italian sausage links
2 tbsp garlic
2 tbsp italian seasoning
2 tsp oregano
Dash of leaf basil
Dash of parsley
Red pepper flakes to taste
Tabasco to taste
1 tbsp minced onion
1 jar of basic pasta sauce
1/4 cup shredded parmersean cheese
Pasta
OVOO

Directions:

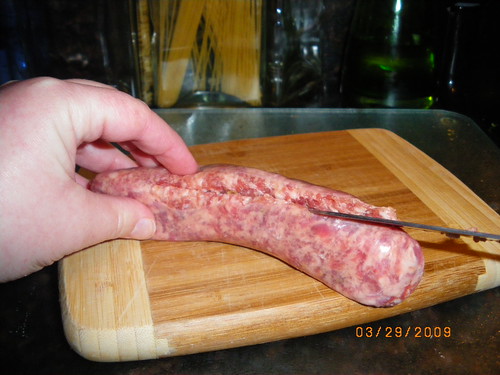
Remove the sausage meat from the casing. To do this, carefully cut the casing along the long side of the sausage and pull the meat out. You can leave it in the casing and cut it, but I find that you get a better flavor and overall look.

In a deep frying pan, heat a small amount of olive oil and then add the garlic. Heat the garlic for 1-2 minutes, then add the sausage, broken up like ground beef. 
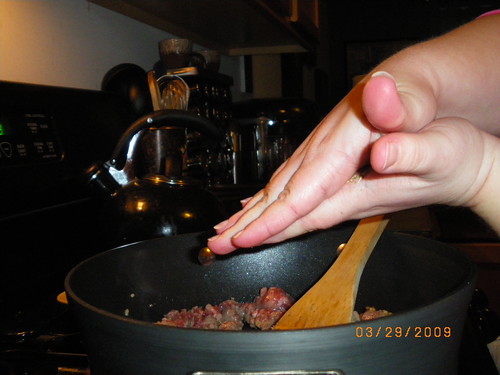
Now you're going to add the spices. Add everything from the italian seasoning to the minced onion.  Here's a hint: When you're using italian seasoning and oregano, the full flavor of these spices, when dried, isn't fully realized unless you "reactivate" the flavor. To do this, put the spices in your hand and rub them back and forth, which will crush the spices and reactivate them to give you more flavor. 

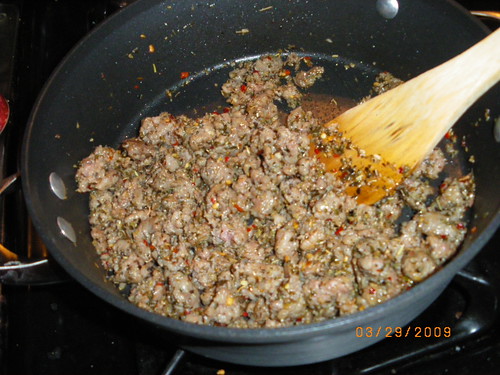
Cook the sausage completely, stirring often. 
Turn down the heat and add the pasta sauce.  You may want to add more spices to the sauce, but there was plenty on the sausage. Sometimes I add more garlic here, as well as some salt and pepper to finish off the flavor. A few minutes before you're ready to serve, add the 1/4 cup pamersean cheese and mix completely to allow it to melt.
Boil and drain your pasta. Serve the sauce with a little more parmersean cheese on top. 


The Wrong Pie

So I set out to make the pie I used to ask for on my birthday every year. I never loved cake, and to this day I greatly prefer the icing to actual cake.  In my head, the pie I asked for was French Silk Pie. I set out to make one for the very first time and I was very excited to learn that I had all the ingridients in house! 

It wasn't until I was nearly finished when I realized: Mom always made me a German chocolate pie. Not a French silk pie. A fatal error. 

My French silk pie is really very good. Its just not quite what I wanted. I have no pictures of the finished pie because I was mad at myself, and I'm too lazy to go get it out of the fridge to take a picture. He're's the recipe of the pie and the pastry shell I made. 

The Wrong Pie: French Silk

Ingredients:

Shell - 
1 1/4 c flour
1/2 tsp salt
1/2 c shortening (I used butter)
3 tbsp cold water

Filling - 

1/2 c butter
3/4 c sugar
2 oz unsweeteneed chocolate
1 tsp vanilla
2 eggs (you don't bake this pie... so use egg substitute)


Directions:

You're going to make your pastry shell first because it needs to cool completely before you fill it. First, combine the flour and salt in a bowl, cutting in the shortening until the mixture is clumpy. I did this in my mixer using the basic mixer thingy. Sprinkle in the cold water 1 tbsp at a time until the mixture is moist. Add more water if necessary to make sure the mixture stays together when you squeeze it. 

Put the dough on the counter and spread into a disc shape. Chill for 2 hours or freeze for 30 minutes. 

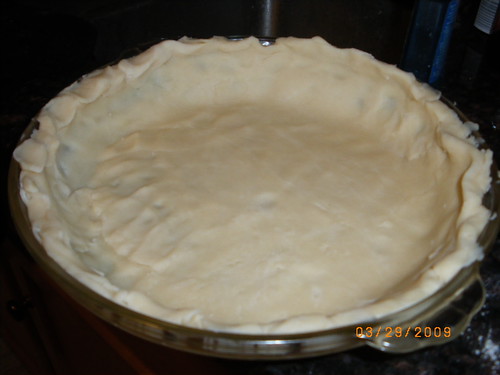
Preheat the oven to 450 degrees. Remove the dough from the fridge/freezer and let stand at RT for 5 minutes. Then, spread the dough into a pie plate, cutting off any excess.
Bake for 10 to 12 minutes, then let it cool completely

For the filling, first melt the chocolate in a double boiler and then set aside to cool.
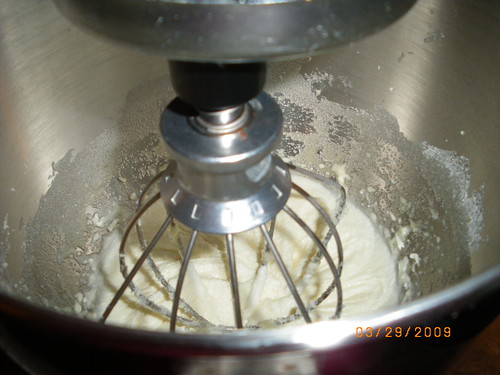
Cream the butter and sugar in your mixture until it becomes lightly colored and fluffy.

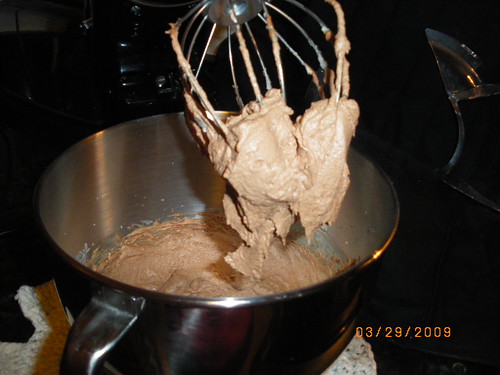
Stir in the cooled chocolate and the vanilla. Mix well, then turn the mixer up to medium. Add the eggs 1 at a time (1/4 c egg substitute at a time) and mix for 5 minutes on medium speed after each egg. 

Spoon the mixture into the shell. Refridgerate for 2 hours, then serve!

Tuesday, March 31, 2009

Chicken Enchiladas 2 - Update

Remember how I said that they weren't all that spicy? Try them leftover a few days later. They have significantly more kick to them, but they're even better reheated. Weird. 

Saturday, March 28, 2009

Chicken Enchiladas 2

Donald and I had some friends over for dinner and games this week. I was really excited for multiple reasons. 1) They're really fun to hang out with. 2) Dinner and games is our kind of evening. 3) Excuse to use fancy china. 

One of our friends is allergic to garlic, which while I think it is tragic in a way, it pushed me to find some great recipes that don't use garlic at all. I decided to go with mexican and make a chicken enchilada using a tomato based sauce with gobs and gobs of chili powder, which oddly enough didn't make it all that spicy but full of flavor. 


Chicken Enchiladas 2

Ingredients: 

  • 3 tbsp veggie oil
  • 1 tbsp flour
  • 1/4 cup chili powder
  • 10 oz tomato paste
  • 2 cups chicken stock
  • 1 tsp oregano (omitted, by accident)
  • 1 tsp cumin
  • 1/2 tsp salt
  • 10 tortillas
  • 2-3 large chicken breasts, boiled and shredded
  • 1 1/2 cups cheese
Directions

Heat the oil just a little bit in a small saucepan, then add the flour. Stir into a paste, then add the chili powder. Mix and heat for 1-2 minutes. Add the tomato paste, chicken stock, spices, and salt and allow to heat for 15 minutes. It ill thicken a little during this time. 

Mix 1/2 cup of sauce and 1/2 cup of cheese with the shredded chicken. If you need, you can make the sauce and chicken ahead of time and store for 1-2 days in the fridge.

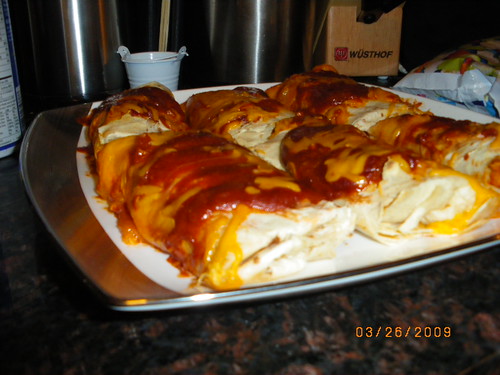
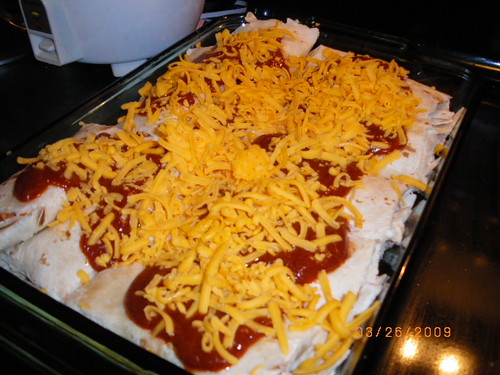
Take about 1/3 cup of the chicken mixture and place into a tortilla, then fold up sealing on both ends. Place into a baking pan. Top all the enchiladas with additional sauce, about 1 cup worth but more if you like them saucy. Sprinkle the rest of the cheese on top of the enchiladas. 


Bake at 350 degrees for 25 minutes or until the cheese is really melted and the enchiladas are hot. 

Chocolate Peanut Butter Ice Cream

Mmm. Homemade ice cream. This was our first chocolate-based attempt and it turned out very well, but due to the peanut butter it is very very soft and creamy. I like my ice cream to be a bit harder, but this is still really good, especially in a sugar cone. The recipe is based on Jerry's (of Ben and Jerry's) chocolate ice cream recipe. 

I wanted to take more pictures of the in-process ice cream, but this stuff froze so fast I didn't have the time.


Chocolate Peanut Butter Ice Cream

Ingredients (makes 1 quart)

  • 2 oz unsweetened chocolate
  • 1/3 cup unsweetened cocoa powder
  • 1 1/2 cup milk
  • 2 eggs (or 1/2 cup egg substitue)
  • 1 cup sugar
  • 1 cup heavy whipping cream
  • 1 tsp vainlla
  • 1/2 cup peanut butter
Directions:

In your double boiler, melt the unsweetened chocolate bars. You don't want the water to be boiling, just hot. 
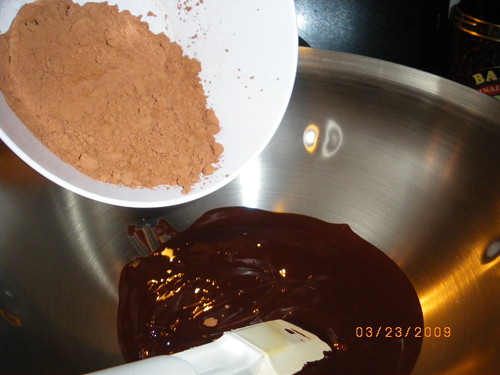
Once the chocolate is melted, add the cocoa powder. This will make the chocolate clump up like crazy and you're going to think "oh god, I really screwed this up, didn't I!"  You didn't. Turst me.

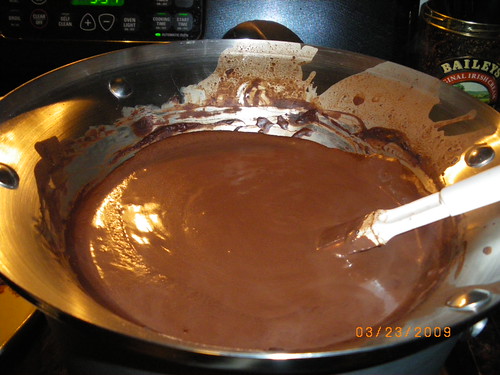
So add the cocoa powder, then slowly add the milk. As the milk heats, it will slowly dissolve and further melt the clumpy looking chocolate. This will take about 20 minutes or so. Stir the mixture regularly.

Eventually, the chocolate will all be melted and it will look like this:
Set this aside and let it cool.  In your mixer, whisk the eggs rapidly until they are fluffy, then add the sugar slowly. Add the whipping cream and vanilla to this mixture. Once the chocolate is cool, mix the 2 together and put it in the fridge for 1-3 hours. Now, here's where I made a mistake. I let this mixture cool almost too much because I did all of this the night before I made the ice cream. Because you're about to add peanut butter, this is going to get super thick, and mine froze too fast, and didn't churn anywhere near enough. Oh well, live and learn.

So, take the mixture out of the fridge and remove 1 cup of the cream mixture. Add the 1/2 cup of peanut butter and mix thoroughly, then add the entire thing back to the ice cream and mix. 

Freeze accourding to your ice cream makers instructions. 

Sunday, March 15, 2009

Classic Stir Fry

Donald and I really love stir fry. They are easy, full of veggies, decently healthy, and so flavorful. Chicken ones are the easiest beceause I find chicken to be so much more forgiving than beef or pork. This is a very basic one, sometimes we're more adventerous. 

The best things about stir frys is that you can substitute and add whatever veggies you want. A few tips: 

- If you add carrots, on the veggie cooking step, but the carrots into the wok before the other veggies by 2-3 minutes. They take much longer to cook than peppers, onions, etc. 
- I hate water chesnuts, but I think these go in very late in the process should you want to ruin... I mean, erm, change your dish with them. 
- Chinese mushrooms. Yumm.

Enjoy!

Classic Stir Fry
Ingredients:

1.5 - 2 lbs chicken breast cut into bite sized pieces
3/4 c soy sauce
2 tsp fresh minced garlic
2 tsp minced onion
1 heaping spoonful brown sugar
1 medium green pepper, sliced
1/2 onion (or one full small onion) sliced thin
2 c white rice (or lettuce for lettuce wraps, according to my friend Monica, this is very good!)


Directions:

In a bowl, mix the soy sauce, garlic, dried minced onion, and brown sugar and stir, then add the chicken. Mix well, stir, and cover, then put the bowl into the fridge for 30 minutes or so. Consider stirring the mixture once in the middle. 

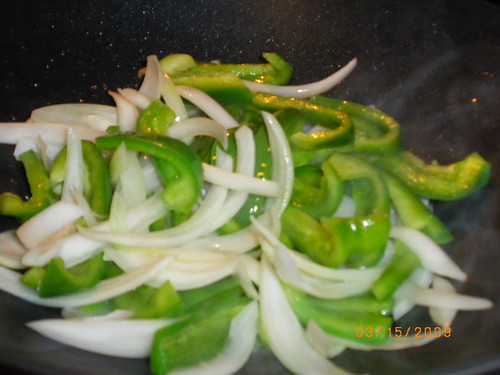
Slice the green peppers and onions, set aside. In your wok, heat 2 tbsp peanut oil until spitting hot. VERY CAREFULLY add the veggies into the wok. Cook for 3-4 minutes, longer if you like your veggies more well done. 
Remove the veggies from the wok and set aside. In the same wok, cook the marinated chicken for about 6-8 minutes or until it is fully cooked. Add back the veggies and allow the sauce to coat everything. 

Serve over rice or in lettuce wraps.


Monday, March 9, 2009

Peanut Butter Cookies

Made these things over the weekend, basic peanut butter cookies. I topped them with a bit of chocolate powder for color and to be different. They turned out really well, but be warned.... you could feed an army (of kindergartners) with this recipe. It makes a ton!

Classic Peanut Butter Cookies

Ingredients:

1 c butter
1 c peanut butter
1 c sugar
1 c packed brown sugar
2 eggs
2.5 c flour
1 tsp baking powder
1.5 tsp baking soda
1/2 tsp salt

Directions: 

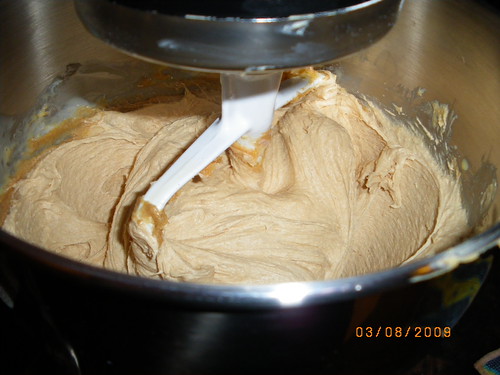
Cream together the butters and sugars plus the eggs until light and fluffy: 
Then add the flour and rest of the dry ingredients. Mix thoroughly, then refridgerate for 1 hour. 

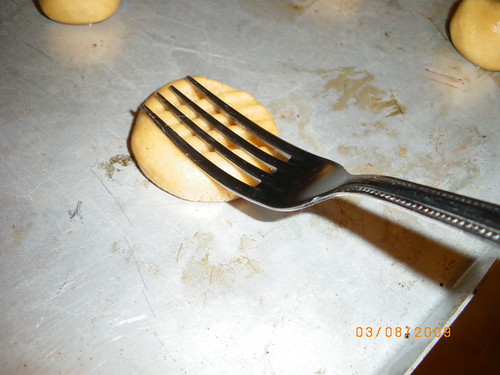
Preheat the oven to 375 degrees. Form the chilled dough into 1" balls. Flatten in 2 directions with a fork to create a crisscross pattern. 
Bake for 10 minutes or until they begin to brown. Remove from pan and allow to cool for a minute or two.

To add the chocolate powder, take a fork and dip it into the powder, shake off most of it. Then over the cookie, turn the fork over and tap off the excess! You can do this with cinnamon as well. 

If you don't want to do the chocolate dust, sprinkle the cookies with white sugar. 

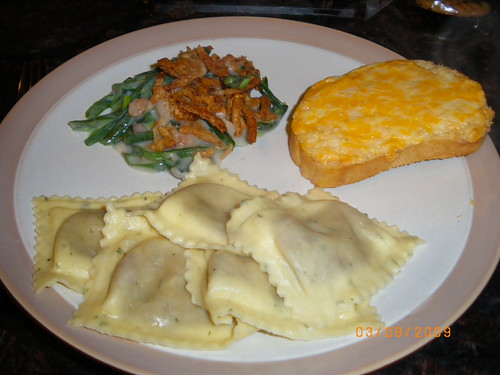
Cheese and Garlic Bread/Green Bean Caserole

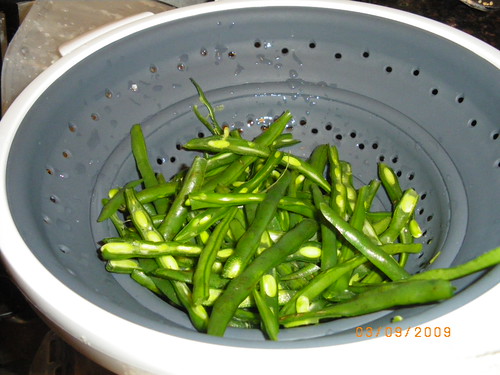
d we dicided to make Green Bean Caserole to go along with that. Donald took the time to french cut the green beans, and I made the rest. Since I've never used fresh green beans for this, I'll throw that recipe in here too. 

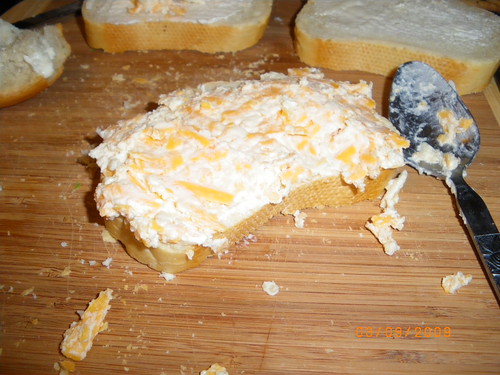
The cheese and garlic bread was a stroke of genius on my part.  I've had things like this before, but really just made this recipe up on my own. It is so good!  Enjoy. 

Garlic Cheese Bread

Ingredients:

1 c shredded cheddar cheese
1/2 c shredded mozzerella
2 tbsp butter
2 tbsp minced garlic (that's right! but you can use less if you don't like it)
2 tbsp sour cream 
6 pieces of italian bread

Directions:

In a small bowl, melt the butter in the microwave for 30 seconds. Add the cheeses and garlic and mix thoroughly. Then add the sour cream. The mix should smooth out a bit. Spread onto bread. 

Note: I buttered my bread first, but I don't think you need to. 

Bake at 400 degrees for about 10 minutes or until the bread begins to brown on the bottom. 

Note 2: I'd add chives to this, for some color.

Green Bean Caserole - Fresh Green Beans!

Ingredients: 

1 can cream of mushroom soup
1/2 cup milk
1 1/2 cups french fried onions
3 cups french cut fresh green beans
Pepper

Directions:

Cut the green beans in half, the long way. This takes forever. And ever. Totally worth it. 
Boil the beans in a medium saucepan for 10 minutes or until they are soft. Drain completely in a strainer, then mix with 2/3 cup french onions, the soup, and the milk. top with the rest of the french onions. Bake at 350 degrees for 25 minutes.

The main dish here is the raviolo, gorgonzola ravioli from Trader Joe's. 


Saturday, March 7, 2009

Spinach Lasagna Rollups

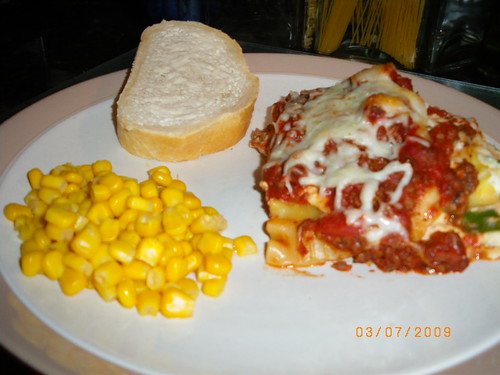
I love lasagna, but I really hate making a whole one for the 2 of us. I eventually get tired of the leftovers, and it takes up SO MUCH ROOM in the fridge!  I've been seeing these rollups on a few blogs, so I decided to try them. They were really very good and despite being labor intensive, totally and completely worth it. Enjoy!

Spinach Lasagna Rollups

Ingredients:

Sauce - This is honestly up to you, but here's my basic sauce recipe: 
1/2 lbs ground beef, cooked and drained
1 tbsp italian seasoning
2 tsp garlick
Salt and pepper to taste 
1 jar sauce
1 small can tomato paste

Cheese and Spinach Mix - This will make enough for 3 rollups
1 c ricotta
1/2 c shredded mozzerella
1/4 c parmersean/romano (mix, or one of the 2)
1 tbsp parsley - mostly for color 
1 c rinsed baby spinach
1 tsp garlic
1 egg (honestly, if you can use 1/8 c egg substitute, its better because you don't need a whole egg)

Other - 
Lasagna noodles (2 per rollup you want to make), boiled and cooled
Mozerella cheese

Directions: 

Preheat oven to 375.

Make your sauce and mix together all the ingredients in the cheese mix. I honestly recommend sticking this in the microwave for a few minutes, stirring often, so its slightly melted and easier to work with. Plus, you're not actually going to bake this thing through, everything is cooked ahead of time. 

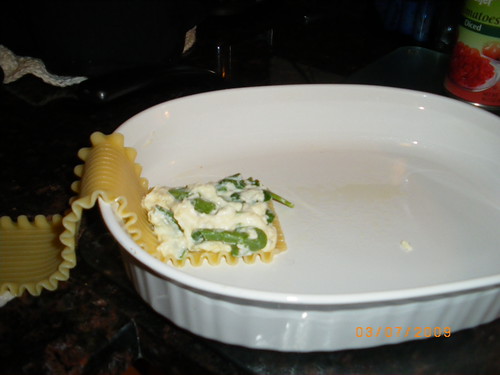
In a baking dish, lay a noodle down and put a heaping spoonful of the cheese mix onto it:
Fold the noodle back over the cheese and put another spoonful of cheese mixture. Fold the noodle back over a third time, and then trim off the remainder of the noodle. Place a spoonful of cheese on the top and then spoon sauce over top of this mixture. 
 Now, take a second noodle and lay it over the sauce, place a layer of cheese, and then double back. Trim off the remainder of the noodle and then cover the noodle and cheese tower in sauce. 

Once you've made all your rollups, top with mozzerella cheese and serve!  Bake about 20 minutes. 


Dark Chocolate Chip Cookies

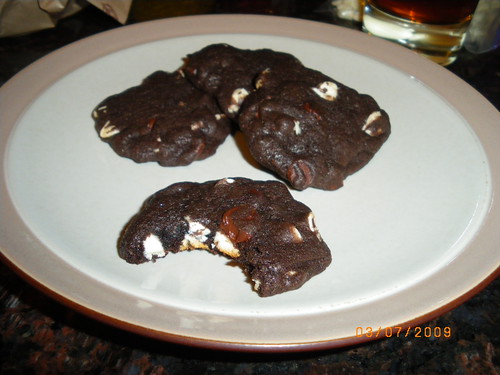
I'm on a cooking baking frenzy this weekend, I have a few friends I need to provide thank you gifts to and what is better than homebaked cookies! My husband requested these, he loves white chocolate (and he gets to be my "are you sure these are good? no really, are they ok?" guy). As a note, these are very chocolate and less sweet. If you want to make them more sweet, experiment with things like agave sweetner and such, but I wouldn't add much more sugar. 

Dark Chocolate Chip Cookies


Ingredients:

1/2 c butter
3/4 c sugar
1 egg (used egg substitute)
1 tsp vanilla

1c flour
1/3 c dark chocolate cocoa
1/4 tsp baking soda
1/8 tsp salt

1 c white chocolate chips
1/2 c semisweet chocolate chips

Directions:

Preheat oven to 350. Put the first 4 ingredients (eggs, sugar, vanilla, butter) into mixer and whisk until fluffy, 3-4 min on medium speed. Don't be me, use the whisk. 

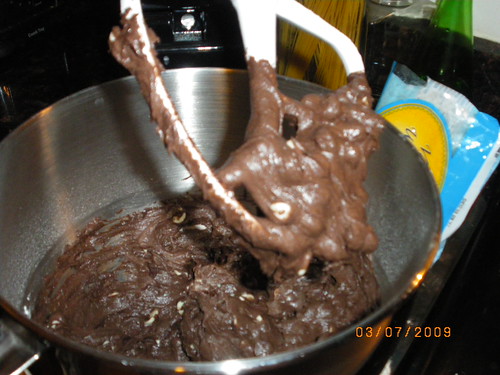
In a separate bowl, mix the dry ingredients together and then slowly add it to the fluffy moist mixture using a low mixer speed. Allow to mix thoroughly, then add the chips and allow to mix in:

Measure out heaping teaspoon fulls of the batter and put onto an ungreased cookie sheet. Bake for 8 - 10 minutes, remove from oven and place onto cooling rack allowing to cool. 

Butter Pecan Ice Cream - Molly Approved

As a wedding gift, Donald and I got an ice cream maker! We have made raspberry, mocha chip, cookies and cream, and butter pecan. This is my first blog entry about them, I didn't really think to blog them until my friend Molly came over for the season premier of America's Next Top Model, during which we decided to eat ice cream. Why not?  

Molly is picky about her ice cream, and I was happy that she approved of mine. 

This recipe is from Ben and Jerry's Homemade Ice Cream and Dessert Book

Butter Pecan

Ingredients:

This makes 1 quart - 

1/2 cupt butter
1 cup pecan halves
1/2 tsp salt
2 large eggs
3/4 cup sugar
2 cups heavy cream
1 cup milk

Directions:

First, freeze your ice cream maker bowl overnight. The next day...

Melt the butter in a heavy skillet over low heat, then add the salt and pecans. Saute, while stirring until the pecans begin to brown. Be careful to not cook the pecans too long or they will get soggy!  Drain the butter into a small bowl and transfer the pecans into another bowl, letting it cool. 

Whisk the eggs until light and fluffy, then add the sugar a little at a time and continue whisking until completely blended. Pour in the milk and cream. Blend well, then add the butter. 

Transfer the mixture to your ice cream maker and follow its instructions. About 2 minutes until the ice cream is "ready" add the pecans and make sure it is mixed well. Freeze and serve!

Sunday, March 1, 2009

Chicken Parmersean

I love this dish and it is one of our staple dinners. I don't know how this never made it onto the blog before, but it didn't!  This is a modified recipe from cooking light magazine and its really good. Feel free to tweak the sauce, that part is really up to you. 

Chicken Parmersean


Ingredients
  • 1 chicken breast
  • 1 egg
  • 1 cup breadcrumbs
  • 2 tbsp parmersean cheese
  • 1 tbsp italian seasoning
  • Pasta sauce, made to your specifications
  • Spaghetti
  • Mozzerella cheese
Directions

Cut the chicken breast into filets, really as thin as you can get them. 1 chicken breast should make 4 full sized filets, which easily serves 2 people. Scramble the egg in a bowl, and in a second bowl, mix the breadcrumbs, pamersean cheese, and italian seasoning. 

Dip the filet into the egg so it is coated, then transfer immediately to the breadcrumbs. Shake in the breadcrumbs and turn over a few times until it is fully coated. In a frying pan, heat up 3 tbsp of olive oil. Once heated, transfer the breaded chicken into the frying pan. Cook for 3 minutes on each side (you may need to add more oil). Pull out of the frying pan and set it on a paper towel. Check to make sure the chicken is cooked completely. 

In a 11x7 baking pan, put pasta sauce along the bottom so it is coated thinly. Layer the cooked chicken breasts on top of the sauce.  Then scoop additional sauce onto each filet. Sprinkle mozzerella cheese on the top, as much as you'd like!

Bake at 350 degrees until the cheese is fully melted and beginning to bubble a little which is about 15-20 minutes. (I forgot to take a picture after taking out my dinner pieces! Oops)
While this bakes, boil the water and cook your pasta. Serve the chicken on top of the pasta with a little excess sauce and a veggie side.

Saturday, February 28, 2009

White Chicken Chili

  • I was talking to a coworker a few weeks ago about chili, and he told me his wife makes an excellent white chili. I love white chili, but I have never attempted it, so I decided to try this one.

It. Is. Amazing. 

Seriously. 

I'm not even going to talk anymore. Go make this. Now. 

White Chicken Chili
Ingredients: 
  • 1 lb chicken breast, raw, cut into small pieces
  • Olive oil
  • 1 small onion, chopped small
  • 2 cloves minced garlic
  • 1 small red pepper, diced
  • 1 can (7oz) green chilis
  • 1 to 2 T diced jalapeno, or more if you're brave
  • 1 1/2 c chicken broth (canned, boulion, whichever you prefer)
  • 1 T cumin
  • 1 1/2 tsp oregano
  • 1/2 tsp red pepper flakes, or more if you like it
  • 2 cans great northern beans, white kidney beans (cannelini beans) or another white bean, drained
  • 1 c sour cream
  • 1 1/2 c shredded colby/jack cheese (you can use just one or both, but I recommend the mix)
Directions: 
I highly recommend gathering the ingredients together before you even turn the stove on. Cut everything up, measure the spices. The cooking itself moves fast, so it is nice to prepare everything.

In a large saucepan or dutch oven, heat a small amount of olive oil. Once heated, add the onions and garlic. Cook until the onions are softer, transparent. Add the chicken and diced red pepper to the mix and cook until the chicken is thoroughly cooked through. 

Add the can of chilis, jalapenos, spices, and chicken broth to the pan. Bring to a hard boil and keep it boiling for 10 minutes. Then add the beans, heating for another 5 minutes. Most of the liquid will be boiled off by this point. You don't want it to be dry, but it should not be like soup. 
Turn off the burner and add the sour cream, mix until blended. Then, add the cheese and mix until the entire thing is smooth.

I served mine with cresent rolls and a dallop of sour cream on the top. It was amazing. I hope you enjoy it as much as I did. Thank you to my coworker's wife!

Homemade pizza

Donald's family has been making pizza for years. In fact, it wasn't until his early teens that Donald knew that you could call a store and order a pizza and have it delivered in a box. I am not kiding. To this day, every single time we see Donald's parents, pizza is one of our dinners. Its a long process, especially if you are cooking for a lot of people. We like to make it for guests that don't mind hanging out in the kitchen/dining room while we cook at chat. 

This pizza specifically is veggies, but I'll post a few tips for some fun toppings you can use and how to best use them on homemade pizza.

A note on dough. The best dough comes from the Bronx, NYC. Too far away? Fortunately for you, most grocery stores have a dough sold in a ball shape in a bag that will do just fine (freezer bins section, usually). I do not recommend the ones in the cans that you peal and then pop open with a spoon and then roll out onto a baking pan. That stuff is gross. Be a real woman/man and get a dough ball and learn to spread it yourself. 

Homemade pizza

Ingredients (for 1 pizza):
  • Ball of pizza dough
  • handfull of flour
  • spoonful of polenta/corn meal 
  • 1/2 - 3/4 c pizza sauce (I recommend Dom Pepino's sauce, you can find it in small cans at fancy pants grocery stores like Hillers, but otherwise, any will do really)
  • 3/4 c mozzerella cheese
  • Toppings (see notes Re: toppings)
Other things you need:
  • Pizza stone
  • Pizza pan
  • Pizza cutter
  • Beer, coat the bottle in flour for ease of use while cooking
Directions:

Unlike my normal directions, these will be more in paragraph form. 

First, about 30 minutes before you will start, put the pizza stone in the oven and turn it on to 375. You need the stone to heat through. Place the dough on the counter during this time to let it warm up a little, but do not leave it too long or it will start to rise again. 

Spreading the dough: Flour your counter really well, flour your hands, and pull the dough out. You will probably need to reform the dough into a good ball shape. To do this, toss it between your two hands for a few minutes. It will become more spherical over time. Once this is done, put it on the counter and with the heal of your hand, start to press the dough out into a flat circle. Yes, using a rolling pin is cheating.  Pressing out the dough will take a while, so be patient. If you're feeling confident, you can spread the dough with your fists in the air. To do this, make a fist with your hand, and with your other hand, pick up the dough and lay it over your fist. Make the second hand into a fist and slowly pass the dough around in a circle between your two hands. This will make it thin out very fast, so make sure you're pulling evenly. 
Spead the dough to the desired thickness. We tend to make it very thing, somewhere between your typical hand-tossed and thin crust pizza. Be careful to make your dough only as big as your pizza stone!

Once the dough is spread, take your spoonful of corn meal and put it on your pizza pan. Shake the pan so the corn meal spreads out. This is basically acting as a lubricant for the dough, you will soon see why. Pick up the dough and place it onto the pizza pan. Then, using a spoon, scoop sauce onto the dough. You will want to use the bottom of the spoon to spread it out. Spread it all the way to the edge of the pizza. You want to be able to see dough through the sauce, but have a good even layer across the pizza.

Now, don't put the cheese on.  You're going to bake the dough with only the sauce for 15 minutes on the pizza stone.  Very carefully, pull out the rack in the oven the stone is on. Shake the pizza pan back and forth to make sure the dough can move and is not stuck. Then, transfer the pizza to the stone. I recomend starting at the back of the stone, letting the dough slide off, then pulling the pizza pan out from underneith the dough so it lays onto the pizza stone. I won't lie, this is hard. But you'll get the hang of it!

After 15 minutes, check the dough. The dough itself should be cooked so that it will not bend if you pick up a corner of it. To take the pizza out of the oven, slide the pizza pan underneith it. 
Now you add cheese. And toppings. You will want to sprinkle the cheese cross the entire crust, evenly. Remember that the cheese will spread out as it melts, so you don't need to cover the entire thing. Cheese goes further than you think! Then put the toppings on. For this pizza, we did onions and mushrooms. The peppers shown below also went on other pizzas that night. 


Put the pizza back in the oven, it will be so much easier to transfer to the stone this time!  Let it cook until the cheese is melted into an orange color, see in the picture below!  This will take about 10-15 minutes. 

Now, BE CAREFUL! The pizza at this point is 375 degrees. The cheese is 375 degrees. When you order a pizza, it is cooler than that. If you take a bite too quick, your mouth will hate you forever. Give the pizza 5 min or so to cool down a little. 

Toppings notes:

- If you want sausage or ground beef, you do not need to cook it first. In the first baking cycle, place bits of raw sausage or beef onto the sauce layer and allow to cook. Through both cooking cycles, it will cook through thoroughly. 
- Pineapples are excellent on pizza, but you don't want them to cook more than 10 minutes. I usually put the cheese on, bake for 5 min, then pull it out, toss on pineapple really fast, then close the oven again. 
- Minced garlic is amazing on pizza

Now I want pizza.

Pancake Bunny

Pancake Bunny
Sometimes, I don't know what I'm doing.